THE RIGHT WAY TO INSTALL SPC FLOOR
2022-01-23


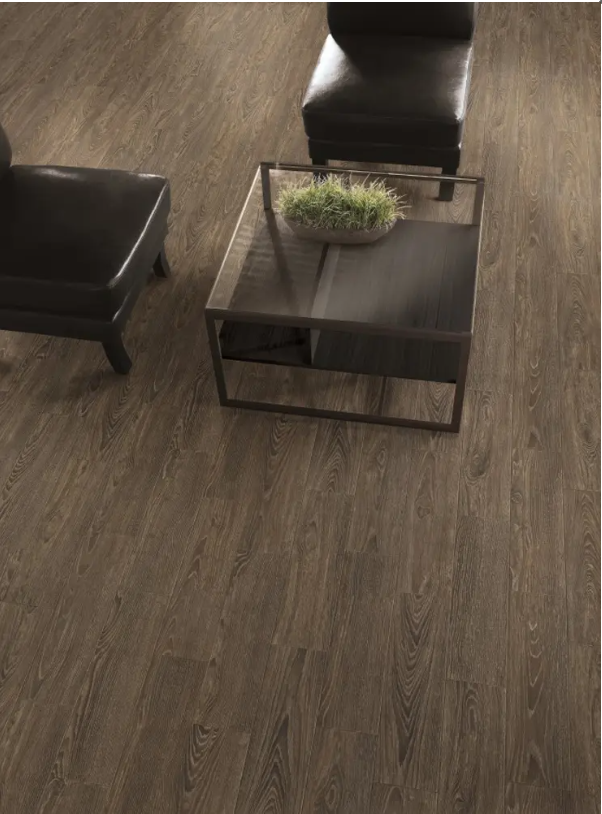
(Summary description)RIGHT WAY TO INSTALL SPC FLOORING
(Summary description)RIGHT WAY TO INSTALL SPC FLOORING
• HANSHAN SPC FLOOR Collection is designed for floating installations only. Never fasten or adhere the planks to a subfloor.
• Always work left to right and start along a wall or longest run for your first row.
• Planks should not be cut narrower than half the width of the manufactured width, nor cut shorter than 8”.
• Cut planks by first marking a straight line across the plank or lengthwise down the plank. Then place a straight edge along the line, and score with a utility knife along the straight edge. Snap the plank on the scoreline. Flip the plank over and cut the pad along the snap line to finish the cut.
• You may also use a jigsaw, circular saw, miter saw, or LVT Plank Cutter, to cut planks. Use blades that are recommended for vinyl and stone composite flooring. Refer to tool manufacturer’s instructions for proper use.
Step 1: Plan the layout of the floor before installing the first plank. Proper planning will prevent narrow rows along walls and short pieces at the ends of rows.
Step 2: Set 1/4" spacers (or wider spacers as otherwise defined in this document) along all walls and fixtures in the installation space.
Step 3: Place the first plank with the tongue side of the plank facing the wall.
Step 4: Connect the next plank to the end of the first plank by placing the tongue into the groove at a slight angle and folding the second plank down to the subfloor to lock the planks together.
Make sure the planks are square to one another by using a tapping block and soft rubber mallet to tap the planks into position.
Tap down on the end seam lightly with a soft rubber mallet to fully seat the tongue and groove. There should be no gap between the planks when properly seated.
**Improperly seated planks will cause installations to be out of square to the room, create a visual curve to the planks, and cause subsequent rows to not seat properly.**
Continue installing the first row of planks according to this guideline.
Step 5: Starting the second row, make sure the end seams are at least 8” apart from the first-row end seams. Cut the second-row plank as necessary to ensure proper seam spacing.
Angle the second-row plank and place the long-edge tongue into the groove side of the first-row plank. Fold-down the plank to the subfloor to lock the seam.
Ensure there are no gaps in the full length of the seam. Use a tapping block and soft rubber mallet to make sure the seam is properly seated.
The long edge seam must be properly and fully seated before inserting the short end of the next piece. Damage and misalignment of planks can occur if not properly seated.
The plank can be lifted out of place and reinstalled as needed to ensure the seams are seated properly.
Step 6: Angle the next plank and place the long-edge tongue into the groove side of the first-row plank. Align the short-end tongue over the preceding plank groove. Fold-down the plank to the subfloor to lock the long-edge seam into place.
Ensure the long-edge seam is tight with no gaps. Once the long-edge seam is seated properly, tap the short-end seam in place connecting to the plank on the left. Use a soft rubber mallet to tap the seam in place. Make sure there are no gaps on the end seam.
Continue installing the second row according to this guideline.
Step 7: Once the first two rows are assembled, push the planks gently against the spacers along the wall. Run a chalk line along the entire length of the inner row to ensure the planks are assembled in a straight line.
Adjust planks as necessary to ensure the first two rows are assembled square and in a straight line.
Step 8: Continue installing the remaining flooring rows following the method in Step 6, making sure that each plank is square and properly seated to its connecting planks. There should be no gaps between planks.
Step 9: The last row of the installation may need to be cut to fit next to the well. Measure the width of the final row, ensuring you leave a 1/4" gap (or wider as otherwise defined in this document). Mark the width to be cut on each plank of the last row measuring from the tongue side of the plank. Score the length of the plank along the marked line, and snap to width.
Install the plank into place as in Step 6. Use a pull bar along the wall to seat the long edge seam. The pull bar should be resting against the cut side of the plank to pull it into place. Never use a pull bar against a tongue or groove side of a plank.
Continue to install as per this guideline until the last plank in the last row is installed.
FITTING AROUND OBJECTS
• When cutting planks around objects, make sure not to damage the surrounding tongue or groove. Damaged locking mechanisms can lead to improper seating or movement between planks.
• Draw a template of the object on a piece of paper or thin cardboard.
• Place the template on the plank to be cut, and trace the lines using a utility knife or jigsaw. Snap or cut the plank as needed to fit the template.
• Install the cut plank around the object following the installation guidelines above ensuring the proper expansion gap around the fixed object.
VI. COMPLETE INSTALLATION
1. Remove the spaces along walls and permanent fixtures.
2. In areas where water may occasionally be on the floor, like bathrooms and kitchens, fill the expansion gaps with waterproof 100% silicone caulk.
3. Clean the floor with an appropriate cleaner.
4. Install or re-install any moldings or trim, making sure to cover expansion gaps along the walls, permanent fixtures.
5. Trim nails must go into the subfloor or the wall, never drive trim nails into HANSHAN SPC FLOOR Collection planks.
6. Cover HANSHAN SPC FLOOR Collection planks with a breathable material like cardboard to protect from other construction traffic. Sweep the floor thoroughly before laying any covering material.
7. Save leftover planks. Do not discard. Leftover planks can be used for replacement planks in the future. These planks match the dye lot of your installed floor.
Scan the QR code to read on your phone
Mobile: +86 13393237419
Tel: +86-311-86320477
Whatsapp/Wechat: +86 13393237419
Skype: zhazha1659972710
Email: cc@hsdb168.com | hs@hanshanfloor.com


